
Dried wood is useful for various purposes – in this article, we will cover the two most common ones: timber as firewood (jump to the section) and for woodworking. The same question – how long does it take wood to dry? – will have different answers for either use.
Why Do You Need to Dry Wood for Woodworking?
You might wonder why drying wood is so essential for woodworking. There are in fact a number of reasons:
Firstly, glue you use would not work if your wood is wet. Also stain and paint might not stick to the wood. Additionally, the wood will be changing its shape while it is drying. If you measure and cut wood that is not dry enough, the workpiece will shrink over time and might not fit with your furniture or woodworking project anymore.
Thus, your best option is to dry the wood before you work on it.
How Long Does It Take for Wood to Dry Before Staining?
If you have the perfect environment for decking your wood, and have ample sunlight, then the average time you need wait for the wood to dry is 48 hours. On the other hand, if you are on the shadowy part of your house, where almost no sunlight reaches, you need to wait at least 72 hours before staining.
Once again, it depends on the storage conditions, like the moisture count and how the woods are decked. The surface moisture of the woods would definitely be dry after five to six hours. However, drying the inside of the wood is a bit challenging and you need to wait a bit for it to dry up.
Always do a thorough checking at regular intervals to see the progress. Also, depending on the weather conditions the drying process might be delayed. For example, if there is moisture in the air give it some extra time to dry. Additionally, in case it rains, make sure that you cover the woods with a tarp to stop the extra water from seeping in and ruining your effort. If, for any reason, you think the wood is not dry enough give it a day or two extra.
How to Dry Wet Wood Before Painting
Now that you know the importance of drying the wood before you use it for any woodworking, let’s have a look at how to dry it. If you are home drying it, without kilns or professional equipments, you need to make sure that you follow all the steps.
Step 1: Process Logs
If you have cut down a tree recently, or there has been a storm and you want to use the logs, make sure you process that in a timely fashion to lumber. This will provide it with ample time and aid in drying without rotting the logs. If the logs have bark on them, make sure you remove it because they act as a moisture barrier and can cause the wood to rot. Do you have doubts whether you have processed it correctly or not? Check the wood again in a few days: if you see a partially rotted wood, then it wasn’t done correctly.
Step 2: Cutting
You should always cut the fresh lumber a bit bigger than the desired size. Why? This is because wood shrinks when it dries. Add to it the fact that when you join two woods you would need to make it plain and maybe use a sander. So, to avoid the wood falling short of the measurement add a few inches on both the sides when you are sizing fresh woods.
Step 3: Sealing
Once you have cut the woods into shapes and sizes, which you need to do, you need to seal the ends of the logs. This will prevent staining and decaying due to the surrounding moisture. It would also allow the moisture to seep out normally, making sure that the ends are relatively smooth. Generally, the moisture seeps at a higher rate (approximately 10 times) from the side surfaces compared to the other surfaces.
So, if you don’t seal the ends they will shrink relatively faster (due to loss of moisture) and cause uneven ends, which is a common drying issue. You can use sealants like wax, polyurethane, shellac or latex paint, depending on your budget. Make sure you coat the ends within minutes to avoid issues later on.
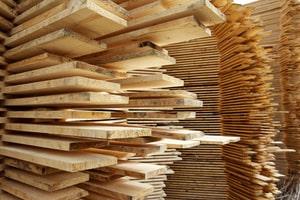
Step 4: Stacking
If you have lumber of equal length and width, the stacking process is generally less troublesome. Once you have sawed a log into planks then stacking them properly, so that they are properly ventilated, is important. You can use stickers for that.
So, what are stickers? They are small pieces of wood that are added in between the planks to aid in ventilation and provide an environment for proper drying. The spacing used by stickers depends on the type of woods, the ventilation space, and the size and width of the planks to be dried. If you want to reach conservative spacing 12” would be a good option. On the other hand, you can even have a sticker as thick as 24” or 16” inches for thicker planks.
Step 5: Adding Weight
Once you have stacked properly you need to add weights on the top of the plank. This is to help them retain their shape after drying. The lumber at the bottom are adequately pressed. However, for the lumbers on top you need to have a proper weight added so they retain their shape. If you have neatly stacked, and weighed the wood, you would have a proper shaped bundle of wood for your easy use.
Step 6: Adding Heat
Once you have reached the EMC (equilibrium moisture content) you need to add heat to bring the MC down. Make sure that you do not rush the process of drying your wood, or else you will have useless lumber or misshaped lumber in your hands. You can do it by moving the lumber from the storage location to a garage or a heated basement. If you have shorter pieces of wood you can use a drying cabinet to bring down the MC to 12% or lesser depending on your requirement.
Firewood: How long does it take wood to dry out before you can burn it?
Lumber that will be used as firewood needs to fully dry out to avoid excessive smoke production and corresponding health risks. Usually, a moisture content of 20% or less is recommended while freshly cut wood comes with up to 100%. To check whether the wood is dry enough for burning, you should have a look at the cuts – if they look dried out and start cracking, it is a good sign. If you prefer being on the safe side, you can use a moisture meter and measure the moisture content (source).
As a rule of thumb, freshly cut wood stacked outside in spring should be good for burning in fall or winter (drying time 6 to 9 months). However, it may take firewood 12 months and more to dry if you do not split it properly or store it inside, e. g. in a barn or shed.
Therefore, make sure you split it quickly – read our powered log splitter reviews for more details – and familiarize yourself with these expert tips on how to season wood quicker.
How You Store Your Wood Has an Impact on Moisture Content
Wood is naturally moisture absorbent. It can either absorb or lose moisture based on its surroundings. Even if your wood is kiln-dried or air-dried, it can soak up moisture depending on the environment of storage. If you store the wood in a damp place it will get bigger by absorbing moisture. If, on the other hand, the air is dry, then it will get smaller and drier. The trick to dry your wood is to keep it in a place that has less moisture and is free from other fungi. while ensuring sufficient air circulation.

The Takeaway
So, how long does it take wood to dry? Well, it depends on how you want to use it, how you prepare the wood, where you dry it and how much moisture it contains which can be measured or estimated. Once this is done, it is time to get started with your lumber drying process, following the steps we introduced in this article.
If you intend to use fresh lumber in your home – whether for woodworking or for heating – you will have to dry it first. However, this process is no rocket science and there are even some options to accelerate it. Have fun and let us know if you encounter any issues!