
A miter saw, also known as a “drop saw” is a woodworking tool used to make cross cuts and miters in wood. The basic miter saw design is generally a circular saw blade mounted on a hinged housing. The wood to be cut is clamped to a base plate and the saw is pulled down for cutting into the wood. Miter saws are quicker, easier and more accurate than cutting wood by hand using manual saws.
Although it is not necessarily a DIY essential, a miter saw makes a great addition to a good workshop. It is definitely good to be able to employ a “drop saw” in your woodworking projects or for cutting coving.
This is why – if you are new to the tool or need to refresh your knowledge – you will want to follow this introductory guide on how to use a miter saw.
Introduction to Miter Saws
Before we walk you through the steps of using a drop saw, we will be sharing a few facts and basics with you.

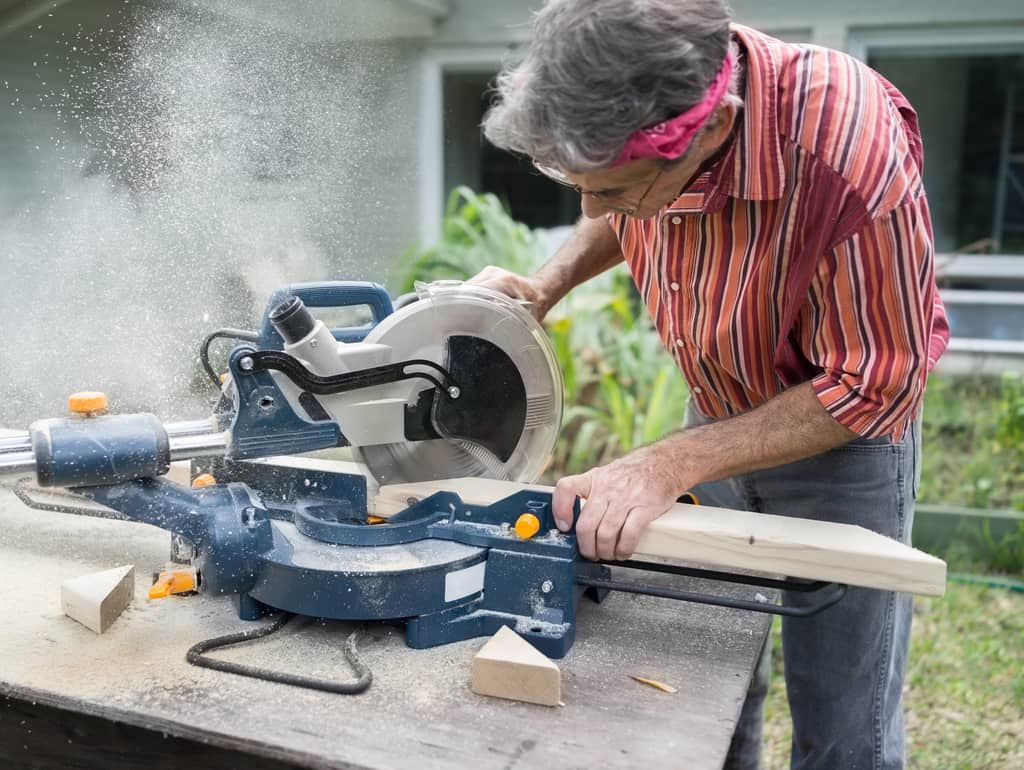
![]()
A compound miter saw (compare prices on Amazon).
Miter vs. Bevel Saw – What Is the Difference?
The first thing that you will want to know about a miter saw is that not all motorized saws that are commonly called by the term are, in fact, “miter saws.” That is due to a misapplication of a popular yet specific term to all similar items, the same way that not all hot tubs are technically “Jacuzzis” but are often referred to as such.
So, how can you find out whether a tool is a miter or bevel saw? That depends on whether it is designed to make miter or bevel cuts.
Miter Cuts Definition
Simply put, a miter cut is an angled cut that cuts across the width of the tin face portion a board.
Bevel Cuts Definition
By contrast, a bevel cut goes through the thicker part of a board.
While most miter saws can make both miter and bevel cuts, for the purposes of this walkthrough, we will be describing things as though you are making a miter cut.
Finding the Best Miter Saw for Your Needs
Miter saws come in different versions with blade sizes usually ranging from 8 to 12 inches (there are also “mini versions” with smaller blades though).
There are also different types of miter saws available in the market:
- the standard model for vertical cuts,
- the compound miter saw that allows you to saw in different angles, and
- the sliding miter saw for use on thicker chunks of wood.
If you do not own a miter saw yet, you might want to read our expert review of the best miter saws and the best sliding miter saws.
Safety Essentials
To begin with, you will want to make sure that you are following basic safety protocols. As is always the case when handling power tools, you will want to make sure that you are wearing protective equipment, which should include safety goggles, clothing that allows for a free range of movement without hanging loose, and ear guards to protect against the sound of the saw.
There are also some miter saw-specific safety tips you will need to follow.
For starters, a miter saw should never be freestanding or wobbly in any way, shape or form, so make sure that it is bolted down and securely fastened to the place where you will be working with it. You will want to refrain from clamping down both sides of the board that you are about to cut. In addition, each miter saw is set up a little differently by the manufacturer, so before you start cutting, you will want to make sure that the saw is able to cut squarely when you set the gauge on the unit to 90 degrees.
Using the Right Blades
Cutting with the wrong type of blade is dangerous, so you will want to be sure that you are choosing the right type for your project. Standard miter saws can make angled cuts of as much as 45 degrees, with mechanisms in place to lock them in position while you cut.
Compound saws allow you to tilt the blade further and, appropriately enough, make compound cuts. Sliding miter saws are typically used on large pieces that will require several cuts up and down the piece, and they feature a horizontal arm that you can slide up and down the saw as needed.
If you need to cut aluminum, follow these step-by-step instructions.
Guide to Using a Miter Saw (4 Steps)
You can use a miter saw for a few minutes to quickly cut a work piece or for hours, if not days, to finish an entire project with this power tool. In any case, you can follow these four steps how to use your miter saw.
1. Fix the Saw Blades
Make sure you get the right type of blades for your project. Since all saw blades wear out with time, at some point, you will have to know how to change a miter saw blade. To replace the blade, simply remove the blade guard with ease, slide off the old blade, take care to dispose of it with care, and slide the new blade on (source). No tricks – the whole process of how to change a miter saw blade is really as simple as that.

![]()
Miter saw blades (you can find them on Amazon).
And now that you have done that, you are ready to start learning how to use a miter saw to cut joints:
2. Powering Up
It is now time to start powering up your saw. You always want to be sure to keep your saw unplugged whenever you are not using it. Plug it in, and check the power levels to make sure you are good to go.
3. Measure and Mark
One of the oldest adages of the handyman/DIY world is to measure twice and mark once, and that ethos holds true here. Take the time to examine any piece of wood you will be cutting, measure out precisely where you wish to make your cuts, and mark them off.
4. Begin Cutting
Now you are ready to finally begin cutting the item in question.
You will want to begin by placing the board that you are going to saw in a position where the angle you are going to cut is aligned with the saw fence and the back of the base area. Take your time in positioning the saw the right way. This will involve loosening the handle and locks that keep your miter saw in a given position. You will want to make sure that you depress the lock handle before you try to move anything, and then work to move the blade to the angle you wish to cut.
Now it’s time to tighten things up again. With the blade in position, tighten the handle once more.
While you are doing this, you will want to make sure that your saw blade remains square with the area of the wood that you are looking to cut. In order to do this, you will want to adjust your wood as necessary. No matter how much you move it or whatever angle you have it at, however, you will want to make sure that by the time you start cutting, it is at least six inches removed from your blade and clamped firmly in place.
You will want to keep one hand on the board that you are going to cut while the other operates the handle and saw.
Once you have everything aligned properly, engage the trigger. Lower the handle until the blade comes into contact with the wood. Be sure not to force the blade or apply too much pressure. Not only is this unsafe, but having to do this typically means something is wrong, as your blade should pass through the wood with ease (you will find some illustrations on Wikihow).
Conclusion
With these tips and tricks, you will be ready to use your miter saw for all sorts of projects.
If you do not have your own drop saw yet, make sure you read our reviews of miter saws and sliding miter saws. You can also check out our instructions and reviews of other types of saws.