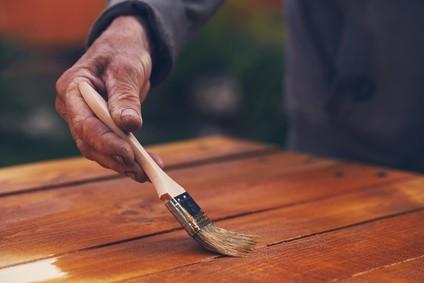
Are you looking for that perfect finish for your latest woodwork project? There are several to choose from. If you are not sure about which type to use, we’re here to help. We have tried and tested most finishing oils and can highly recommend using top of the line danish oil. It’s one of the easiest to use, is non-toxic and some are even deemed food-safe. If you are considering it, let’s take a closer look at how to apply danish oil.
Find and compare Danish oils on Amazon.
We can recommend two excellent methods of danish oil application to finish your wood. One method is done in a day, the other is done over several days. You can decide which method to use depending on how much time you have and how quickly you need the wood to dry.
The One Day Method
Materials:
- The danish oil
- Disposable latex gloves
- Foam or good quality Brush
- Lint-free cloth
- Microfiber tack cloth
Prepare the surface
This means starting with a clean, dry surface. You can start by sanding down the wood until it’s smooth. Any types of wax, dirt, or grease need to be removed. Any wood with varnish or other finishes should be sanded down. It is possible to oil wood that has been dyed or stained before, but it’s advisable to use it on smooth, sanded wood.
Be sure to remove any wood dust from the surface as well. Any old wood with damage, rot or mould needs to be repaired and cleaned. We recommend a shop vac for the surface and surrounding area to ensure dust particles don’t float back. After that, you can go over the surface with your microfiber tack cloth to remove any remaining dust particles.
Danish oil works best on new, clean wood, as it is often made with Tung oil, which absorbs into the wood to add coat and protection. It is a good idea to check that the particular danish oil you are applying contains no other synthetic resins or varnish, as they may block the wood, rather than absorb the finish. Please use this site as a reference.
First Coat
Apply the danish oil liberally with a foam brush or clean cloth. Danish oil will take full effect after two to three coats. The more coats of finish you add, the deeper the shine and stronger the protection.We suggest you move the item to a different area that is dust-free and well ventilated. You don’t want to risk wood dust and other debris from your workshop to ruin the surface. The danish oil will emit a strong smell when first applied. It is odourless when dry.
How many coats of danish oil do you need?
Allow the wood to absorb the oil for about 20-30 minutes, then wipe away excess oil and even out pooling. Then, re-apply danish oil, paying particular attention to areas where the oil has not soaked thoroughly. Allow the oil to be absorbed into the wood. Continue applying coats until you have reached the desired shine and results. Three coats should be enough for shine and protection.
How long does danish oil take to dry?
Once you are happy with the result, wait another 10-20 minutes and then wipe off any pooling or drips. Let the item set. Return after about an hour to check for drips or pools of oil which were not absorbed. You can touch the surface to check. It should feel oily, but dry. Wipe the wood again, just to be sure you have removed all the excess oil. Check for any dry spots, in case you need to add more oil to these areas.
Longer Method on How To Apply Danish Oil
If you are not in a hurry or are working with a larger piece of wood, you may want to stretch the process out over a few days. We would recommend following the same steps, however after the first coat, allow to sit for about 20 minutes, then remove excess oil and let it sit for 24 hours.
On day two, repeat the same process. Apply oil on the wood until it is properly coated and the wood stops absorbing. Again, wait about 20 minutes and remove any excess oil pooling on the surface. Leave the wood to dry overnight and then on the third day, repeat the same steps. The wood should be darker and not absorbing as much of the danish oil. Apply more danish oil, wait 20 minutes, and remove the excess oil.
This method allows you to remove any bumps, flaws or bubbles once the wood dries between coats.
Conclusion
Danish oil is a great choice to use as it will protect the wood without filmy residue or clouding the grain and colour of your wood. It drys in the wood and is in fact, one of the easiest oils to use. It comes highly recommended for ease of use and desired results. If you like to start your project, find your Danish oil on Amazon now.
If you consider other types of oil as well, find more details in our overview article where we compare the pros and cons of Danish oil with those of Teak oil, Hemp oil, Tung oil, Linseed, and Boiled Linseed oil.

