
Tiles in the bathroom can be laid on the floor and the walls. Some people decide to have tiles only on the walls. Others wish to have tiles laid on both the walls and the floor. An experienced DIYer will be able to do this within one or a few days although it requires some skills and effort. However, a key consideration of such projects is where to start tiling around the bath:
When laying tiles on the bathroom floor, you can basically start on either side of the room. For aesthetic reasons, you may want to start with whole tiles in the most visible areas and lay cut tiles where they are less visible. When tiling the wall, it is best to start from the bottom to the top as cut tiles will be less visible above one’s head. It is also much easier for most DIYers: If starting at the top, tiles may slip, fall and break.
Should You Tile the Floor or the Wall First?
What is pretty confusing for most people is whether to start tiling the floor or the wall first. The best way to start is by tiling the walls first followed by the floor.
If you are doing it the other way around, you are running the risk of exposing the floor to damage. This should be avoided if possible, to prevent leakage on the floor which might lead to severe water damage.
When you have finished tiling the walls and continue laying tiles on the floor, the risk of damages to the wall is way lower than the other way around.
Planning the Tiling Project
As always, when doing any kind of project, you have to plan. If you intend to have tiles in your bathroom, there are some important aspects that you need to consider which includes:
Choosing the Right Types of Tiles for Your Bathroom
In the bathroom, you don’t just lay any kind of tiles. A bathroom is a place where a lot of wear and wetness occurs.
Therefore, the tiles you lay should most importantly be extremely wear- and moisture-resistant. Other characteristics that you want to consider are color, style, and water absorbency.
If you want your bathroom to look appealing and stylish, you need to make up your mind about the color and style. In this case, porcelain and ceramic tiles are the best choices as there are virtually thousands of different designs and colors available on the market. For bathroom floors, porcelain tiles are often preferred over ceramic tiles as they have a better water-resistance (i.e. they absorb less water).
Natural stone or limestone tiles can be an appealing option as well. However, if you intend to use these types in your bathroom, make sure you understand their water absorbency rate and apply a sealant if necessary.
In terms of ease of laying, ceramic and porcelain tiles are probably the best choice for DIYers with not much tiling experience.
The Number and Size of the Tiles
The size of the tiles depends on your preference as well as on the size and dimensions of your bathroom. If you have a small bathroom, small or medium-sized tiles will be more suitable. Some people may prefer small tiles in a large bathroom as well, or even different sizes for floors and walls.
Being small means their quantity will be higher, you might avoid cutting tiles and a small bathroom tends to appear to be larger. It is the other way around for larger bathrooms. These might need big tiles to make them appear more spacious.
Before you buy tiles, you should determine the exact square footage and layout of your bathroom, as well as the area covered by each of your preferred tiles. You can then calculate exactly how many tiles are needed. You will find instruction in the following video:
When it is time to buy tiles, buy a few more than the required number. This is to cater for breakages during tiling but also to have a reserve stock if needed. Styles and colors of tiles change frequently and if tiles get damaged in a few years you will probably not be able to find a proper replacement. In such cases, you are lucky if you have stored a few extra tiles in your garage or basement.
Timing
Tiling is a demanding and time-consuming kind of job. It needs your dedication and full concentration. So, if you’re a DIY person, make sure you have set aside enough time to perform the task.
You may also want to seek your family’s or friends’ support in case you need a hand.
But, if you are busy elsewhere and cannot take the time needed to complete the job, you might also consider hiring the services of a professional tiler. It might not be cheap but prevents you from living with an unfinished project if you have time constraints.
How Do You Start Tiling Around the Bath
Although tiling a bathroom is not the easiest kind of home improvement project you can do it yourself if you have the skills and the time. The time it takes depends on the size of the room, the amount of preparation work and your experience. As a rule of thumb, you can plan with a range between 4 hours and 2 days for tiling the floors of an average-sized bathroom plus the same amount of time for the walls. If you are doing it for the first time, you might want to plan with the upper end of the range.
Tools and materials needed
Below is a list of tools and supplies necessary for tiling around a bathroom.
Tools
- Drill
- Bucket
- Tile spacers
- Tape measure
- Pencil
- Pipe and cable detectors
- Battens
- Mixing paddle
- Trowel
- Adhesive spreader/notched towel
- Grout spreader
- Grout finisher
- Tile scribe
- Meter block
- Hack saw
- Spirit level
- Wooden support
- sponge
- Window scraper
- Metal ruler
- Cloth
- Gauge sticks
Supply
- Wall tiles
- Grout
- Grout protector
- Waterproof Tile adhesive
- Tile trim
- Screws
- Water
- TSP solution
Getting Started
Tiling a bathroom may be challenging especially if you do not have much experience with the entire process. However, this does not mean that it is entirely impossible to install perfect tiles in your bathroom. Read and understand the following steps, watch the video embedded in this article and block sufficient time for the project.
Before you start the work, make sure you have all the tools and supplies ready (refer to the list in the previous section).
Prepare the bathroom wall for tiling
Use the TSP solution to remove any stains and grease so that the tiles can stick properly. Make the wall as rough as possible by removing any crap on the walls.
Take the tile dimensions and use a pencil to make markings on two DIY gauge sticks; one for the length and the other for the width. A gauge stick is a long piece of wood with tile size marks for correct tile spacing.
Use these markings to draw lines on the wall for tile placement. When using the gauge sticks, remember to leave 3-mm spaces for the insertion of tile spacers. Measure and mark the entire working area and determine at which point you will need to cut the tiles.
Lay the tiles
Get a bucket with water, then add the waterproof adhesive powder (follow the instructions on the pack) and mix it thoroughly to leave no lumps. Alternatively, you can use one of the adhesives that come already pre-mixed.
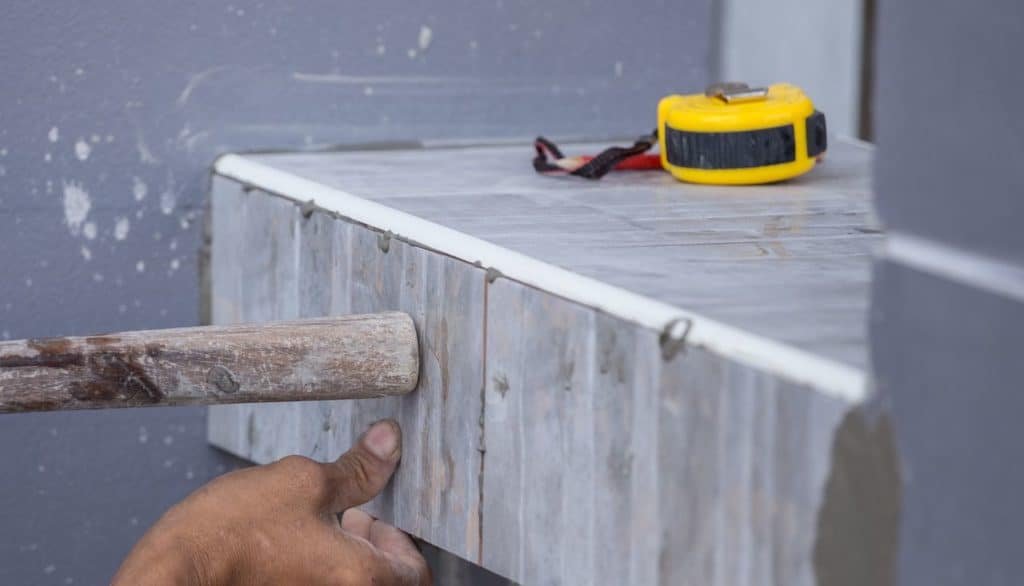
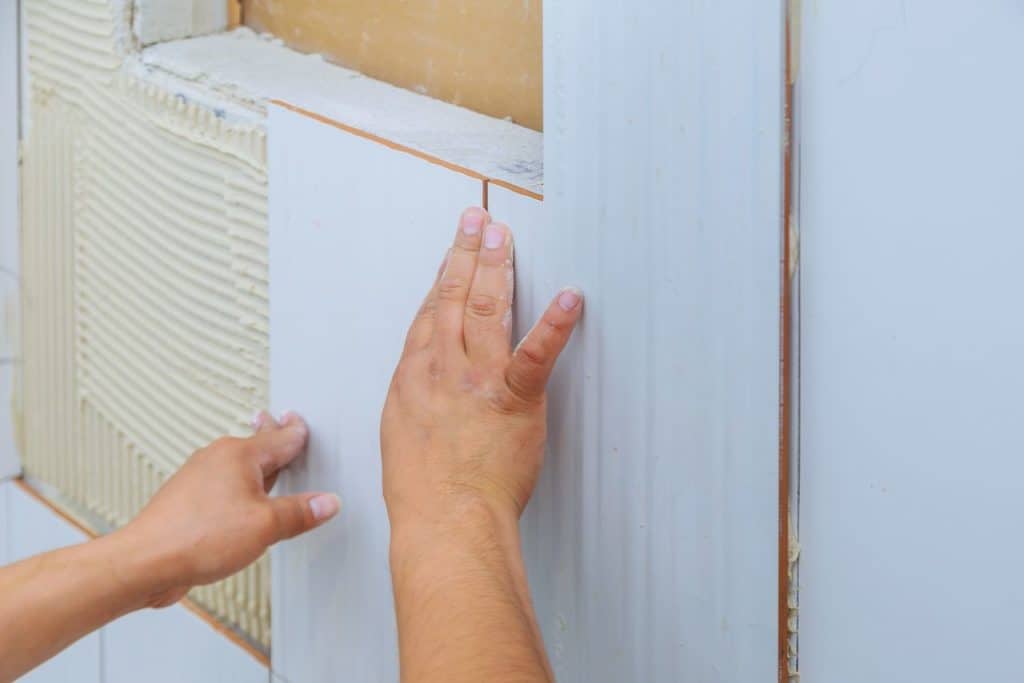
Apply tile adhesive using an adhesive spreader to the area where you wish to lay a tile. Use the tile marks you made to start laying the tiles on the wall. Stick the tiles properly on the bathroom floor or wall and start from bottom to top (for the previously mentioned reasons).
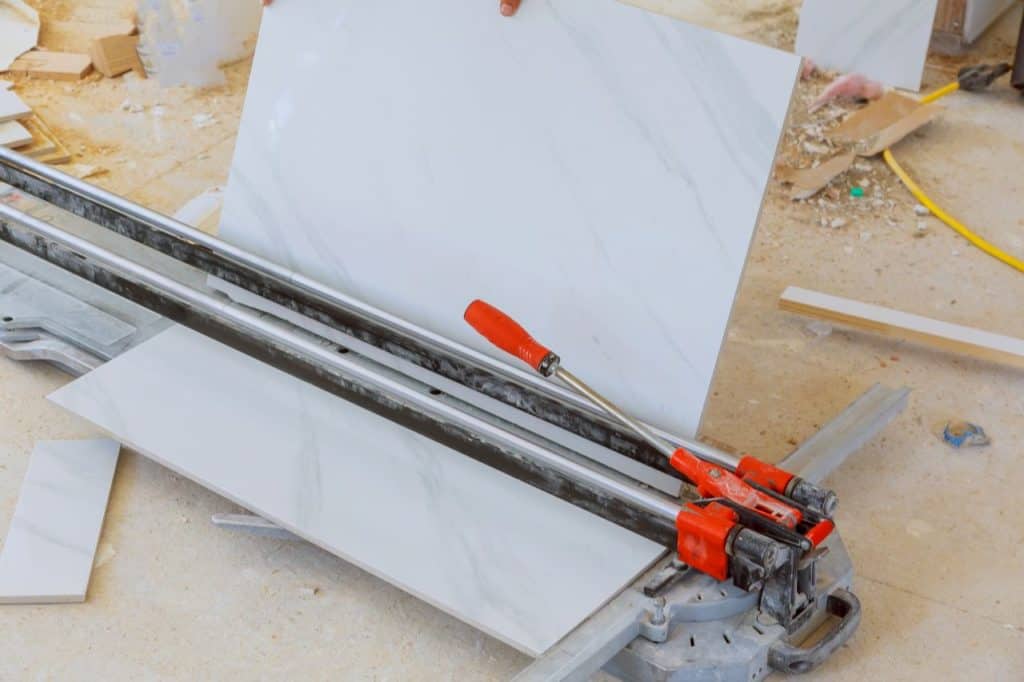
If needed, cut the tiles using a tile scribe or cutter. Alternatively, you can also use an angle grinder with a tile cutting disc.
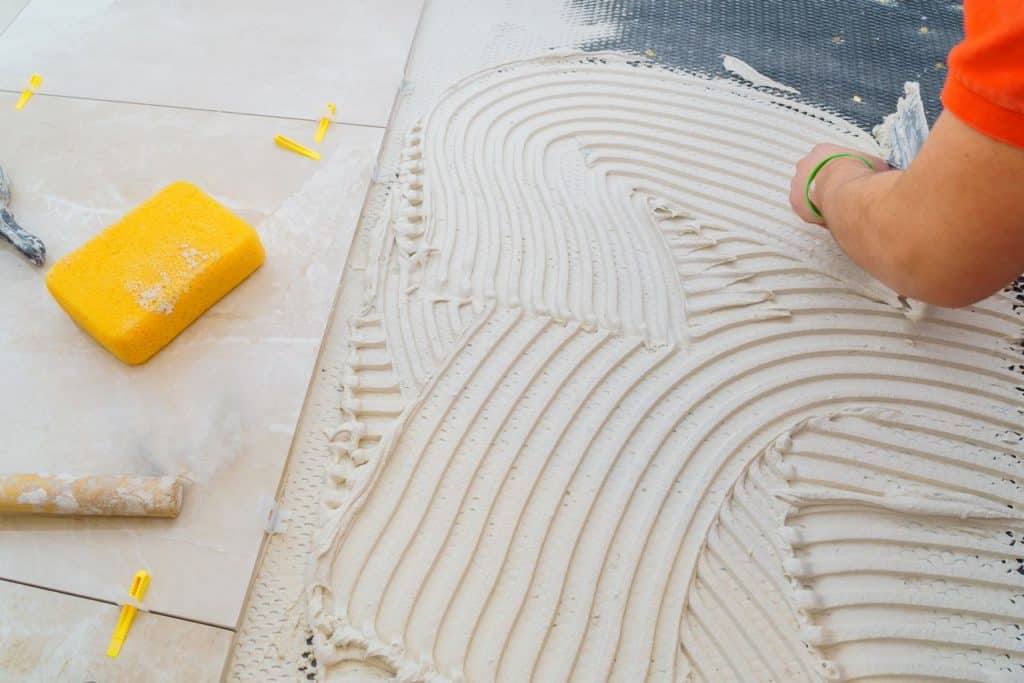
Insert tile spacers between tiles in a way that there are 3-mm spaces left for applying adhesive and grout. Do this for both sides, horizontally and vertically.
Apply Grout
When the adhesive is fully dried (refer to the drying time suggested by the manufacturer) and tiles are well stuck to the wall, you can proceed to the application of the grout.
Mix grout in a separate bucket. Stir it until it has a creamy and viscous consistency.
Apply it to seal tile spaces using a grout spreader or a trowel and a sponge. Make sure it settles well within the spaces.
Use a grout finisher to make it look more professional and appealing. Wait for it to dry. Afterward, apply grout protector for the grout to last long.
When you have finished laying tiles, wipe off any dirt from the surface so that your tiles are left looking clean and ready to use.

Conclusion
With some skills, sufficient time and the guidance we have shared, tiling around the bath should be a doable project for most DIYers. Keep in mind that tiling is demanding and tiring, so do plan enough time for it, especially if you are new to tiling.
We hope that this article has provided you with practical guidance and useful tips and tricks.
Sources: Stackexchange, Bidvine, Thisoldhouse, Tilesporcelain
Thanks for sharing this great tip on where and how to start when tiling around a bath. Really informative and helps making less errors when doing renovation projects.