
You probably like the smell of wood, the sound of a saw or a chisel shaping a work piece and the look of a smooth and sanded wooden surface. And, most of all, the rewarding feeling and the pride when you see, touch and use the finished item that you have been creating for a couple of hours, days, weeks or even months! If you have been into woodworking for some time, you must be pretty familiar with these emotions. If you are just starting your woodworking hobby, you will soon experience this yourself (among set-backs though).
Whether you are an (semi)expert or a greenhorn, you will find this article useful to learn or refresh some of the woodworking essentials.
What is woodworking?
There are probably a hundred different definitions of woodworking, ranging from forestry to construction with wood. However, we like to look at it from a DIYer’s perspective: thus, woodworking is a productive craft which consists of cutting, shaping and joining wood for creating useful as well as decorative stuff.
Within this broad definition, you can determine your personal approach to woodworking, depending on your skills, experience, equipment and time commitment. If you do not have any experience with woodworking, it is not difficult to find a starting point: A simple woodworking project does not necessarily require a lot of experience or physical strength. It is also possible to proceed with it at your own pace and with a rather basic set of tools and equipment. On the other side of the range are highly complex woodworking projects conducted by professionals with advanced and expensive tools and equipment. Think of fancy furniture, the use of wood in architecture or the restoration of historic treasures as examples for high-end woodworking projects.
Woodworking has been practiced since ancient times: cutting woods into wood sticks and sharpening them for use as spears might have been one of the first-ever woodworking use cases. Over thousands of years, it evolved from a rather basic or even primitive shaping of objects to the creation of artful wooden sculptures and complex architectural installations.
Anyone who has a sense of art, who is curious and likes to create something tangible can do woodworking! Even if you are a white-collar worker or a couch potato, you will be able to create beautiful wooden objects within a short time period. Although woodworking as such is not difficult, one should start with a rather simple project whose results can be used but remain less visible in your home. This is because even with lots of talent and motivation, the first project is unlikely to be the best in your DIY woodworking career. That is normal and no reason to lose motivation nor interest – remember your first driving lesson (or any other skill you have learned in your life) which was probably not the best road trip of your life either. If you manage to cope with some initial disappointments, you will be rewarded in the long run. Therefore, woodworking is actually considered as therapeutic for those suffering from depression and anxiety. This is not only because the process of creating things out of wood can distract from negative thoughts. It is also due to the sense of fulfillment it can provide when seeing the finished product.
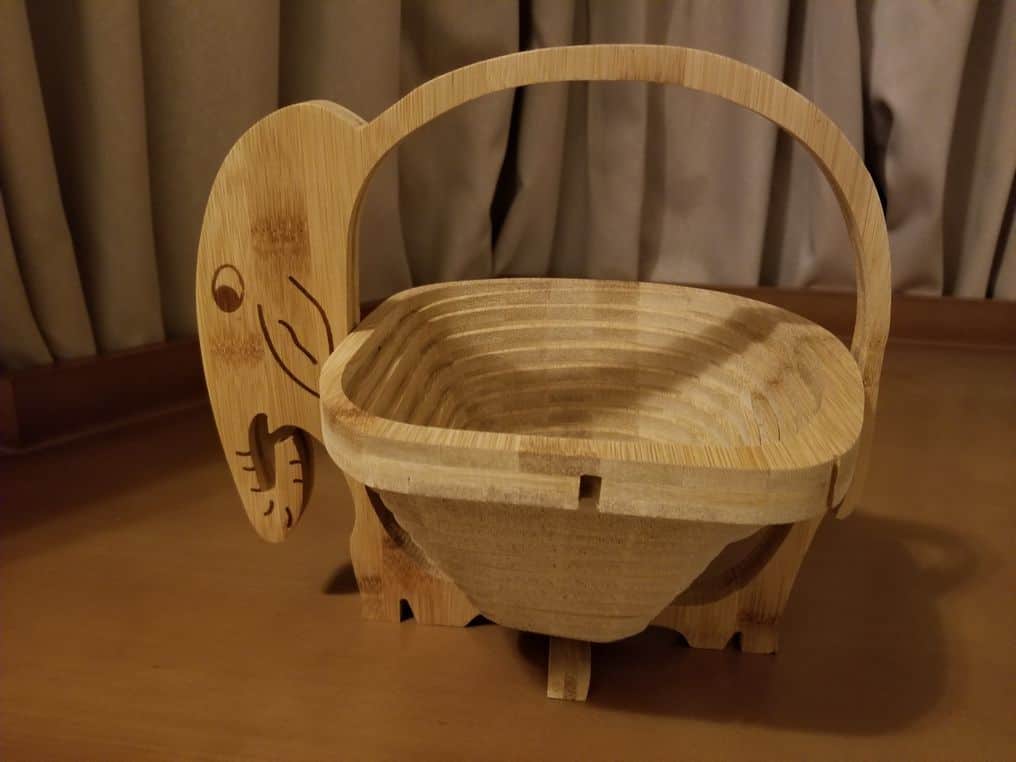
A fruit bowl resembling an elephant.
Working with wood involves a variety of materials and tools. It happens quickly that beginners but also for experienced DIYers are getting confused by the variety of different types of wood, tools, equipment and all their respective advantages and disadvantages. With this article, we aim to provide you an overview of the most common and useful woodworking elements and give some guidance which of them fit with your project. If you like to take a deep-dive into a specific aspect of woodworking, follow the links in this article or visit our dedicated woodworking section.
Types of Woodworking Projects
While there are a million different outputs of woodworking projects, these projects can be classified into 6 fundamental categories. In this section, we will provide you an overview of the most popular types of woodworking projects:
- Cabinetry, the craft of creating your own furniture,
- Carpentry, the profession of producing and turning chunks of wood into objects for furniture, construction and artistic items,
- Wood construction, the use of wood for buildings,
- Wood carving, the art of turning a work piece into an artistic decorative object,
- Joinery, the merging of different work pieces into one single piece, and
- Woodturning, which refers to forming a wooden chunk into a symmetric shape.
Cabinetry – Build Your Own Furniture!
Cabinetry is the practice of producing furnishings and cabinets from timber. Cabinetry leverages methods such as shelving and creating joints by fitting bevels, dados, chamfers schemes, etc. While industrially produced furniture usually comes with a focus on functionality, cabinetry in the context of manufacturing may also include artistic processing of workpieces which may also include carving and woodturning.
Furniture can be standardized and free-standing or tailor-made and fitted to a particular place. The chairs, tables, and shelves that you might have bought from department stores or retail stores are examples for industrially produced standardized objects.
On the other side of the range, there are custom-made objects manufactured by a cabinet-maker, e.g. fitted vitrines or cabinets. Somewhere between them are usually modern kitchens that are installed with standardized elements that are fitted into the layout of a room.
Cabinetry is a profession that usually requires a professional training. Nevertheless, you can leverage some methods and techniques from cabinetry as a DIYer to create your own pieces of furniture.
Carpentry – the Profession of Woodworking
Carpentry is a craft and a profession that covers different expressions of artistry, production, and construction. For the latter, a carpenter is the one accountable for producing furniture, cabinets, as well as any item where joinery and precise woodworking is required. Examples may include the building of barns, doors or wooden ceilings. In addition, patio decks, siding, as well as certain roof installations will also fall under the purview of a carpenter.
As with cabinetry, it will be hard for a DIYer to produce outcomes like a professional carpenter. However, there is no reason not to use carpentry techniques for projects around the house with a smaller scale.
Wood Construction – Build a House Made of Wood
Wood construction refers to the use of wood as a construction material for buildings. This can be limited to certain installations like wooden window frames or doors, but also include houses entirely made of wood.
Read more in our dedicated article on wood construcion.
Wood Carving and Whittling – Giving Wood an Artful Shape
Wood carving is a profession as well as a hobby that requires – apart from the technical skills and experience – a lot of concentration, time, as well as patience. It involves using tools like whittling knives or chisels that help form a chunk of wood. People who are carving usually aim to produce artistic objects, ornament wooden items or restore valuable old pieces of furniture. You have probably seen a lot of wood sculptures and objects at handicraft markets and antique stores – those are good examples of wood carving products.
Under the category of woodworking, we suggest distinguishing between the following three different types of wood carving techniques.
Handmade Carving
This type of wood carving requires manual skills, a sense of accuracy as well as time, patience and concentration. The carver is usually starting a new project by selecting one or more chunks of top-quality wood. If the project involves more than one piece of wood, he might work on them separately and later fixes the pieces together (using joinery techniques or the art of inlay work, depending on the type of project). He/she brings the chunks of wood in a rough shape first, working with manual and power tools like chisels, saws, and sanders. Afterwards, the carver uses different types of carving tools, including knives, for crafting the fine shape and elaborating the details.
Paper Models and Woodworking Plans
Less experienced hobby carvers tend to rely on paper models and plans (which are also used in standardized carving productions). These plans can reach from templates that are fixed to the work piece (e.g. if the basic shape is sawed out from a flat wood piece) to detailed instructions or samples that are often copied into pencil drawings on the wood. Although this is not as creative as free-style carving, it can be the method of choice, particularly for beginners.

![]()
Good wood carving plans are available for a few dollars on Amazon.
Such plans and instructions can be found on the internet, either for free or with small price tags or in the form of subscriptions. Subscriptions can set you back a couple of hundred Dollars, and the quality of free plans can vary among the different websites. From our experience, it is worthwhile to buy plans with good customer reviews on Amazon – they will cost you a few bucks, however, this approach will prevent you from struggling with low-quality templates and from wasting your money on subscriptions.
Machine Carving
Machine carving is quite common nowadays when it comes to industrial or manufacturing carving that is standardized and replicable. This can also involve a carver who is using a lathe as a support for his/her manual carving work (see “woodturning” for further details). However, carving can as well be performed with minimal human involvement, e.g. in the industrial production of furniture.
Obviously, it is easier to use machines for flat or 2-dimensional work pieces. However, modern machines’ capabilities are not limited to those application areas and can also cover more complex shapes.
Joinery – Bring 2 Different Workpieces Together
Wood joinery refers to the connection of different wooden pieces when producing objects like toys or furniture, for instance. With joinery, one product can be manufactured from different types of materials. Joinery is more common in industrial or manufacturing productions rather than for hobby woodworkers. In professional applications, there are different types of joinery works, including butt joinery, rabbet joinery, lap joinery, and housing joinery.
Woodturning – Create a Perfectly Symmetrical Object
Performing the craft of woodturning necessarily requires a wood lathe. The lathe is spinning and rotating a chunk of wood which has been molded between two fixation points. Carving the work piece while it is rotating allows to turn a chunk of wood into a decorative and perfectly symmetrical (usually round) shape.

![]()
Woodturning refers to turning wood chunks into artistic and usable objects. Several useful and inexpensive instructions are available on the market.
A lathe enhances the accuracy and shortens the time for carving a work piece that is supposed to be symmetrical. This can include decorative elements, basic shapes for further manual carving or furniture components like table legs, for instance. In case you are a DIY woodworker with some basic carving experience, woodturning can be an enjoyable, fascinating, and rewarding enhancement of your hobby. Leveraging your carving experience, you will be able to easily learn some fundamentals of this craft within a short period of time and achieve quick successes in the form of decorative self-made objects.
 |  |
| A wood lathe that spins the work piece. | The tools required to shape the work piece. |
The Different Types of Wood
One of the hardest choices for newbies and experts likewise is to choose the right type of wood for a particular project. To make an informed decision, it is important to be somewhat familiar with the characteristics and the pros and cons of different types of wood, e.g. the hardness and strength of a particular wood. As there are probably thousands of different woods in the world, we will limit the introduction to the most popular ones:
Pine
Pine is a type of softwood which is comparatively simple to work with and therefore a good choice for newbies. One can easily carve and drill it, for instance. Pine typically has a light yellowish shade which appears warm and can help enhance the coziness of rooms.
Cedar
Another type of softwood which is rather easy to work with is cedar. There are different types of cedars: white and red cedar are both used cedar woods. The latter is known for its red and warm tones as well as its aromatic note.
Cedar is extremely durable, and this makes it a great choice for any kind of outdoor use, e.g. as outdoor furniture. Cedar is also often used for making wardrobes and chests – one of its benefits is that it helps to ward off moths. Read more about the characteristics of the different Cedar woods in our article red vs. white Cedar.
Redwood
Redwood is likewise extremely resilient to moisture which makes it a great choice for any type of outdoor or basement furniture. It is comparatively soft and also convenient to work with. Redwood comes with a slight reddish shade which makes it a popular woodworking project choice.
Cherry
Cherry is a type of hardwood which is a bit challenging to work with. Nevertheless, it belongs to the category of a softer hardwood. Also, it comes with a warmer reddish hue and had been popular in the 19th and early 20th century. Thus, many antiques are made of Cherry wood.
Maple
Maple wood exists in two different types: a softer one as well as a harder type. If you are new to woodworking you might find it easier to work with the softer maple wood.
The use of the harder option requires some experience. However, as it is an extremely stable and durable wood, hard maple is a good choice for virtually any type of furniture.
Learn more about maple wood in our article hard maple vs. soft maple.
Oak
Oak is one of the strongest and hardest types of wood. For this reason, it may be challenging for beginners to work with oak wood. However, oak has been very popular for furniture-making since ancient time, and it is also a popular choice for flooring and decorative items. Read more about oak and the differences between red oak and white oak in our blog.
Which Tools Should You Use for Woodworking?
Below, we are shedding a light on some of the most essential woodworking tools that DIY woodworkers should be familiar with.
If you want to buy all of them at once, it will set you back a few thousand bucks. Thus, we recommend beginners to start with simple woodworking projects that do not require many tools and enhance the workshop equipment gradually (read also the “how to” suggestions below).
Chisels

![]()
Chisels are essential woodworking tools.
Compare prices and custormer reviews on Amazon.
Chisels are common woodworking tools with a sharp head that cuts or carves wood when they are moved and pressed against a work piece. They can also be used with a mallet when working on extremely hard wood or to achieve efficient cuts. Depending on the size of the chisel and the technique used, chisels can be useful for both rough shaping as well as elaborating fine details.
Chisels have been common tools for carving and furniture-making for thousands of years. In industrial productions, they are used for parts or details of workpieces a machine would not be able to process.
Chisels are available in different types, shapes and sizes. Their typical use cases involve whittling and sculpture as well as creating tendons, mortise and dovetails in joinery.
Circular saw

![]()
Circular saws can be used to saw or sand wood.
Compare different models on Amazon.
Circular saws come as table-mounted or handheld tools with abrasive or cutting discs. Such saw helps a woodworker sand or cut wood. They are also used in joinery to create dados.
While a circular saw is versatile and mobile, a careful set-up is necessary to ensure a stable and firm stand before cutting or sanding any work piece. Otherwise, this lightweight machine would be prone to move accidentally during its use which could cause serious injuries.
Jigsaw

![]()
A jigsaw allows to move over a work piece while sawing it.
Find the best jigsaw deals on Amazon.
A Jigsaw is a power tool with a reciprocating saw blade that can be moved over a chunk of wood while sawing it. This type of handheld saw is quite versatile and can be used for straight cuts as well as cutting curves. The tool’s cut can be extremely fine, depending on the blade’s teeth size and the distance between the teeth.
Table saw

![]()
A table saw provides a stable basis for the work piece.
Find table saw bargains on Amazon.
A table saw is a portable or stationary saw that uses disk-shaped blades and is mounted on a table. Work pieces can be laid and moved on the table which provides a stable basis and allows very precise cuts. This machine is probably the most frequently used tool in the majority of carpentry and cabinetry workshops thanks to its versatility and efficiency. Table saws are able to create consistent and straight cuts, and there is a wide variety of blades available on the market for usage in various areas of application.
Router

![]()
Routers are tools for hollowing out work pieces.
Check current prices on Amazon.
Router help hollow out a work piece, create rounded edges or dados. They are hand-held tools which are usually placed upside down, i.e. the bit on the bottom side, when hollowing out a part of the workpiece. It is likewise used for cutting profiles for molding as well as adding decorative borders to furniture. Thus, they are common in the areas of carpentry and cabinetry. The use of routers requires a special work space – you will find more details in our review of router tables.
Grinder and Sander
Whenever you need to cut or sand wood, it’s a job for one member of this versatile power tool family. Read our article grinder vs. sander to get a first overview of these powerful tools:
Scroll Saw
Whether you want to saw decorative objects or prepare inlay works for furniture – a scroll saw is the power tool of choice for these types of projects. They are also great to introduce woodworking to adolescents thanks to the option of creative simple projects while – if you adhere to the rules – being comparatively safe to work with. Read more about scroll saws and our recommendations for beginners and (semi)professionals.
Pocket knife
If you are interested in whittling, you will likely start with a pocket knife. Read our reviews of pocket knives and our expert tips.
Find out more about other woodworking tools and equipment in the dedicated section on our site.
How to Start Your First Easy Small Wood Project in 7 Easy Steps
Time needed: 1 day
These 7 steps will help beginners find their ideal first woodworking project.
- Woodworking Safety
Play it safe! Before you start working, read our safety tips and get all the equipment that you need to stay safe and healthy.
- Prepare Your First Project
When starting your woodworking project, it is essential to dedicate enough time to plan all the steps of your project and to familiarize yourself with the tools and materials that you are going to use. Try to keep focused when working on your project and try to avoid any sort of distraction while you are working. Make sure that you have a suitable place where you can do woodworking – ideally a barn or a workshop, but balconies or basements will do as well. Just avoid working in rooms where you do not want to have accidental marks or stains on your floor or dust on furniture or rags.
- Choose a Simple Woodworking Project
Do not go for a too difficult project if you are new to woodworking since you might not be that experienced at the beginning. This is because you are naturally more prone to making errors as a newbie, particularly with more complex work. To prevent yourself from losing motivation for future projects, you should start with simple woodworking projects. Popular woodworking projects for beginners include making a small shelf, a table or simple chairs. You can also build add-ons for existing furniture, e.g. a divider for your closet.

- Get the Right Equipment
Some argue that beginners should buy “cheap and simple” tools and equipment as they would not be able to use the full functionality of good equipment. We do not agree though for the following two reasons:
1) “Cheap and simple” might be good enough if not much functionality is required. Unfortunately, these tools often come with a poor quality and technical limitations to their use. You might end up being frustrated and buying another set of better tools very soon – in that case, there is no saving at all from buying cheap stuff.
2) We think of woodworking as a long-term hobby and we are still using tools that we bought a decade ago. Even if you might need only a limited functionality today, this will quickly change when you are becoming more experienced, advanced and keen of exploring new techniques and projects. If you are serious about woodworking, you should invest in intermediate power tools with good value and quality that you can use for years and that leave room for you to grow. Check our unbiased expert reviews and select the best-value equipment. - Manage Your Expectations
Do not strive for perfection for your first few projects. Some things will necessarily go wrong, so do not feel disappointed in case you make any mistakes. Embrace and learn from those setbacks instead, and perceive it as an area to improve going forward.
- Enjoy Woodworking
Enjoy yourself and have fun while doing the job. This will keep you motivated and improve your efficiency over time. Do not forget to reward yourself once you have finished a particular milestone or project.
- Sharing is Caring
Involve your family, let your children support you in easier and safe tasks and do not forget to take some photos of the work-in-progress and the final outcome:
Thus, you can share it with family and friends, and you can keep those pics as a reminder of the hard but rewarding work for your first project.
What else do you need to know for woodworking?
You have learned lots of woodworking basics so far, and maybe you have already started your first project (while following our steps and recommendations). However, even if your work piece is shaped and has the desired form, you have not yet completed your project: An extremely important step – often underestimated by beginners – is wood finishing. This step ensures durability and an appealing look of your works, ideally for a couple of years.
Wood Finishing
Sanding smoothens and polishes the surfaces of wooden pieces and is a necessary step before applying sealants and oils. Oils, polyurethane (“poly”), varnish, shellac, stains and paint add a final coat on top of the wood which enhances its appearance and makes it more resistant to UV radiation, water and stains.
Sanding
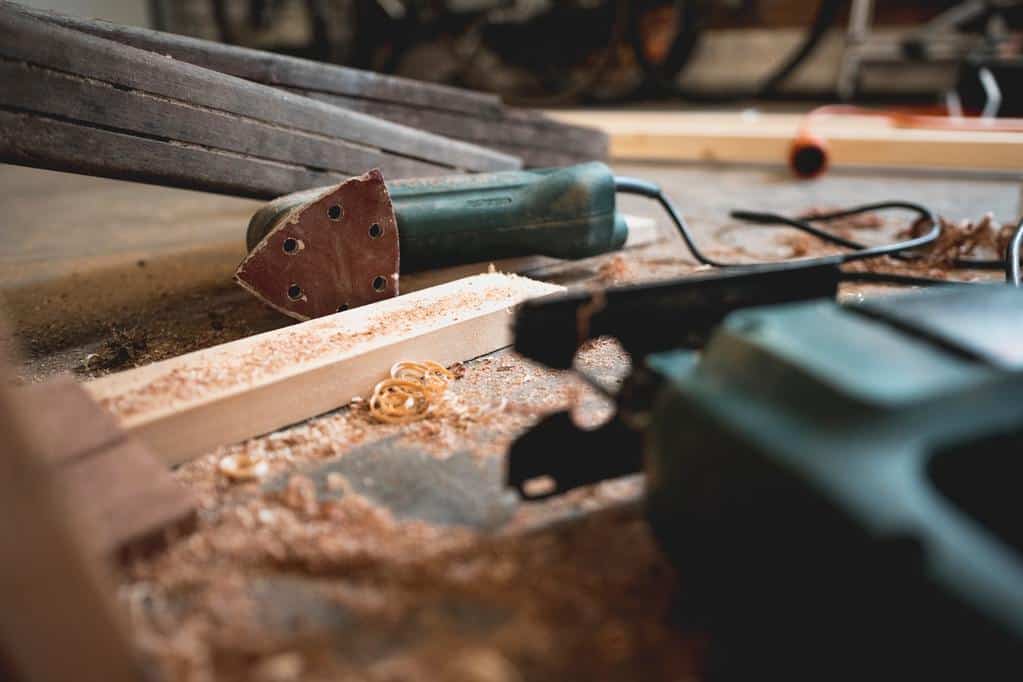
You can use sandpaper or pads for small or complex projects for which you prefer manual sanding. For larger work pieces, on the other hand, you will likely want to be more efficient and decide to use certain power tools, i.e. sanders and grinders. These tools are available in numerous types and variants, supporting jobs from refinishing large hardwood floors (large belt sanders) to sanding small pieces of furniture (palm sanders). Find dedicated articles, expert reviews and instructions in our section on sanding and grinding.
Sanding is the first step in the process of finishing or refinishing wooden surfaces. An alternative approach for more wood removal is planing. Read this article to learn the differences between sanding and planing.
Oiling
Oils are basically natural products – in some cases supplemented with additives though – that sink in when applied on wood. Oiling provides some protection and thus enhances the durability of wood without changing its appearance or color too much. Read more in our oiling and finishing section.
Poly, Varnish and Shellac
These types or finishes usually offer more protection than oils, but they can also be more visible on the surface. This can imply warm shades and enhancements of the natural grain but also a plastic-like look, depending on the selected type of finish and way of application. Read all the details in our Wood Finishing FAQs.
Stain, Paint and Lacquer
All these finishes change the color of the wood. Stain usually retains the natural grain and changes the color shade of the wooden surface. If you prefer a natural finish, you might want to consider coffee as a wood stain.
Paint and Lacquer, on the other hand, add a solid layer on top of the wood that covers most of the natural appearance of the wood. These finishes provide lots of options to add color to wooden pieces like furniture or sculptures and, at the same time, provide great protection to the wood. Find detailed articles on paint in our section on wood finishing and read our comparison of lacquer vs polyurethane.
Nailing, Screwing and Drilling
It seems obvious that nailing, screwing and drilling are among the basic techniques for woodworking. While it seems easy to nail, screw or drill, the devil lies in the details. A non-suitable screw can make wood splatter and thus destroy the results of week-long work. Read our expert tips for the right tools and equipment.
Conclusion
Congratulation! You have chosen woodworking as your hobby – one of the most rewarding and productive areas in the DIY sphere. And you have almost finished this super-long article (and hopefully learned a lot of things). Keep on moving forward, get your first woodworking plans, read our expert instructions and reviews or find inspiration for your next projects now.